Connect Pie to Your AI Workspace
Access Pie’s testing data directly from Claude, ChatGPT, or any MCP-compatible platform. Analyze test results, import test cases from CSV, find duplicates, manage issues, and generate reports - all through natural conversation.
Fix Bugs Automatically with AI
The most powerful use case for Pie’s MCP integration: let your AI coding agent fix bugs that Pie finds - automatically.
When Pie detects an issue, it captures the full context - reproduction steps, screenshots, expected vs. observed behavior, and DOM snapshots. Connect Pie to an AI coding agent like Claude Code, and the agent can pull the issue, understand exactly what broke, surgically fix the code, and open a PR - all from a single prompt.
Fix a Single Bug
Get issue ISS-142 from Pie and fix it in my codebaseYour AI agent will:
- Call Pie’s MCP to fetch the issue - repro steps, expected behavior, observed behavior, screenshots
- Locate the relevant code in your project
- Apply a targeted fix
- Commit and create a PR
Batch-Fix All Issues
Get all approved issues from Pie. For each one, fix it and create a separate PR.Pie provides enough context per issue - steps to reproduce, assertions, severity, visual evidence - that an AI agent can fix them independently without asking follow-up questions.
Why This Works
Unlike generic bug reports that say “the button is broken,” Pie issues include:
- Exact reproduction steps the AI agent executed to find the bug
- Expected vs. observed behavior with specific assertions
- Screenshots and DOM snapshots showing the actual state
- Severity and classification so your agent can prioritize
This means AI coding agents don’t need to guess what went wrong - they have the same context a senior QA engineer would provide in a detailed bug report.
Works with any MCP-compatible tool. The examples below use Claude Code, but this works with Cursor, VS Code Copilot, Windsurf, or any agent that supports MCP.
Setup Guide
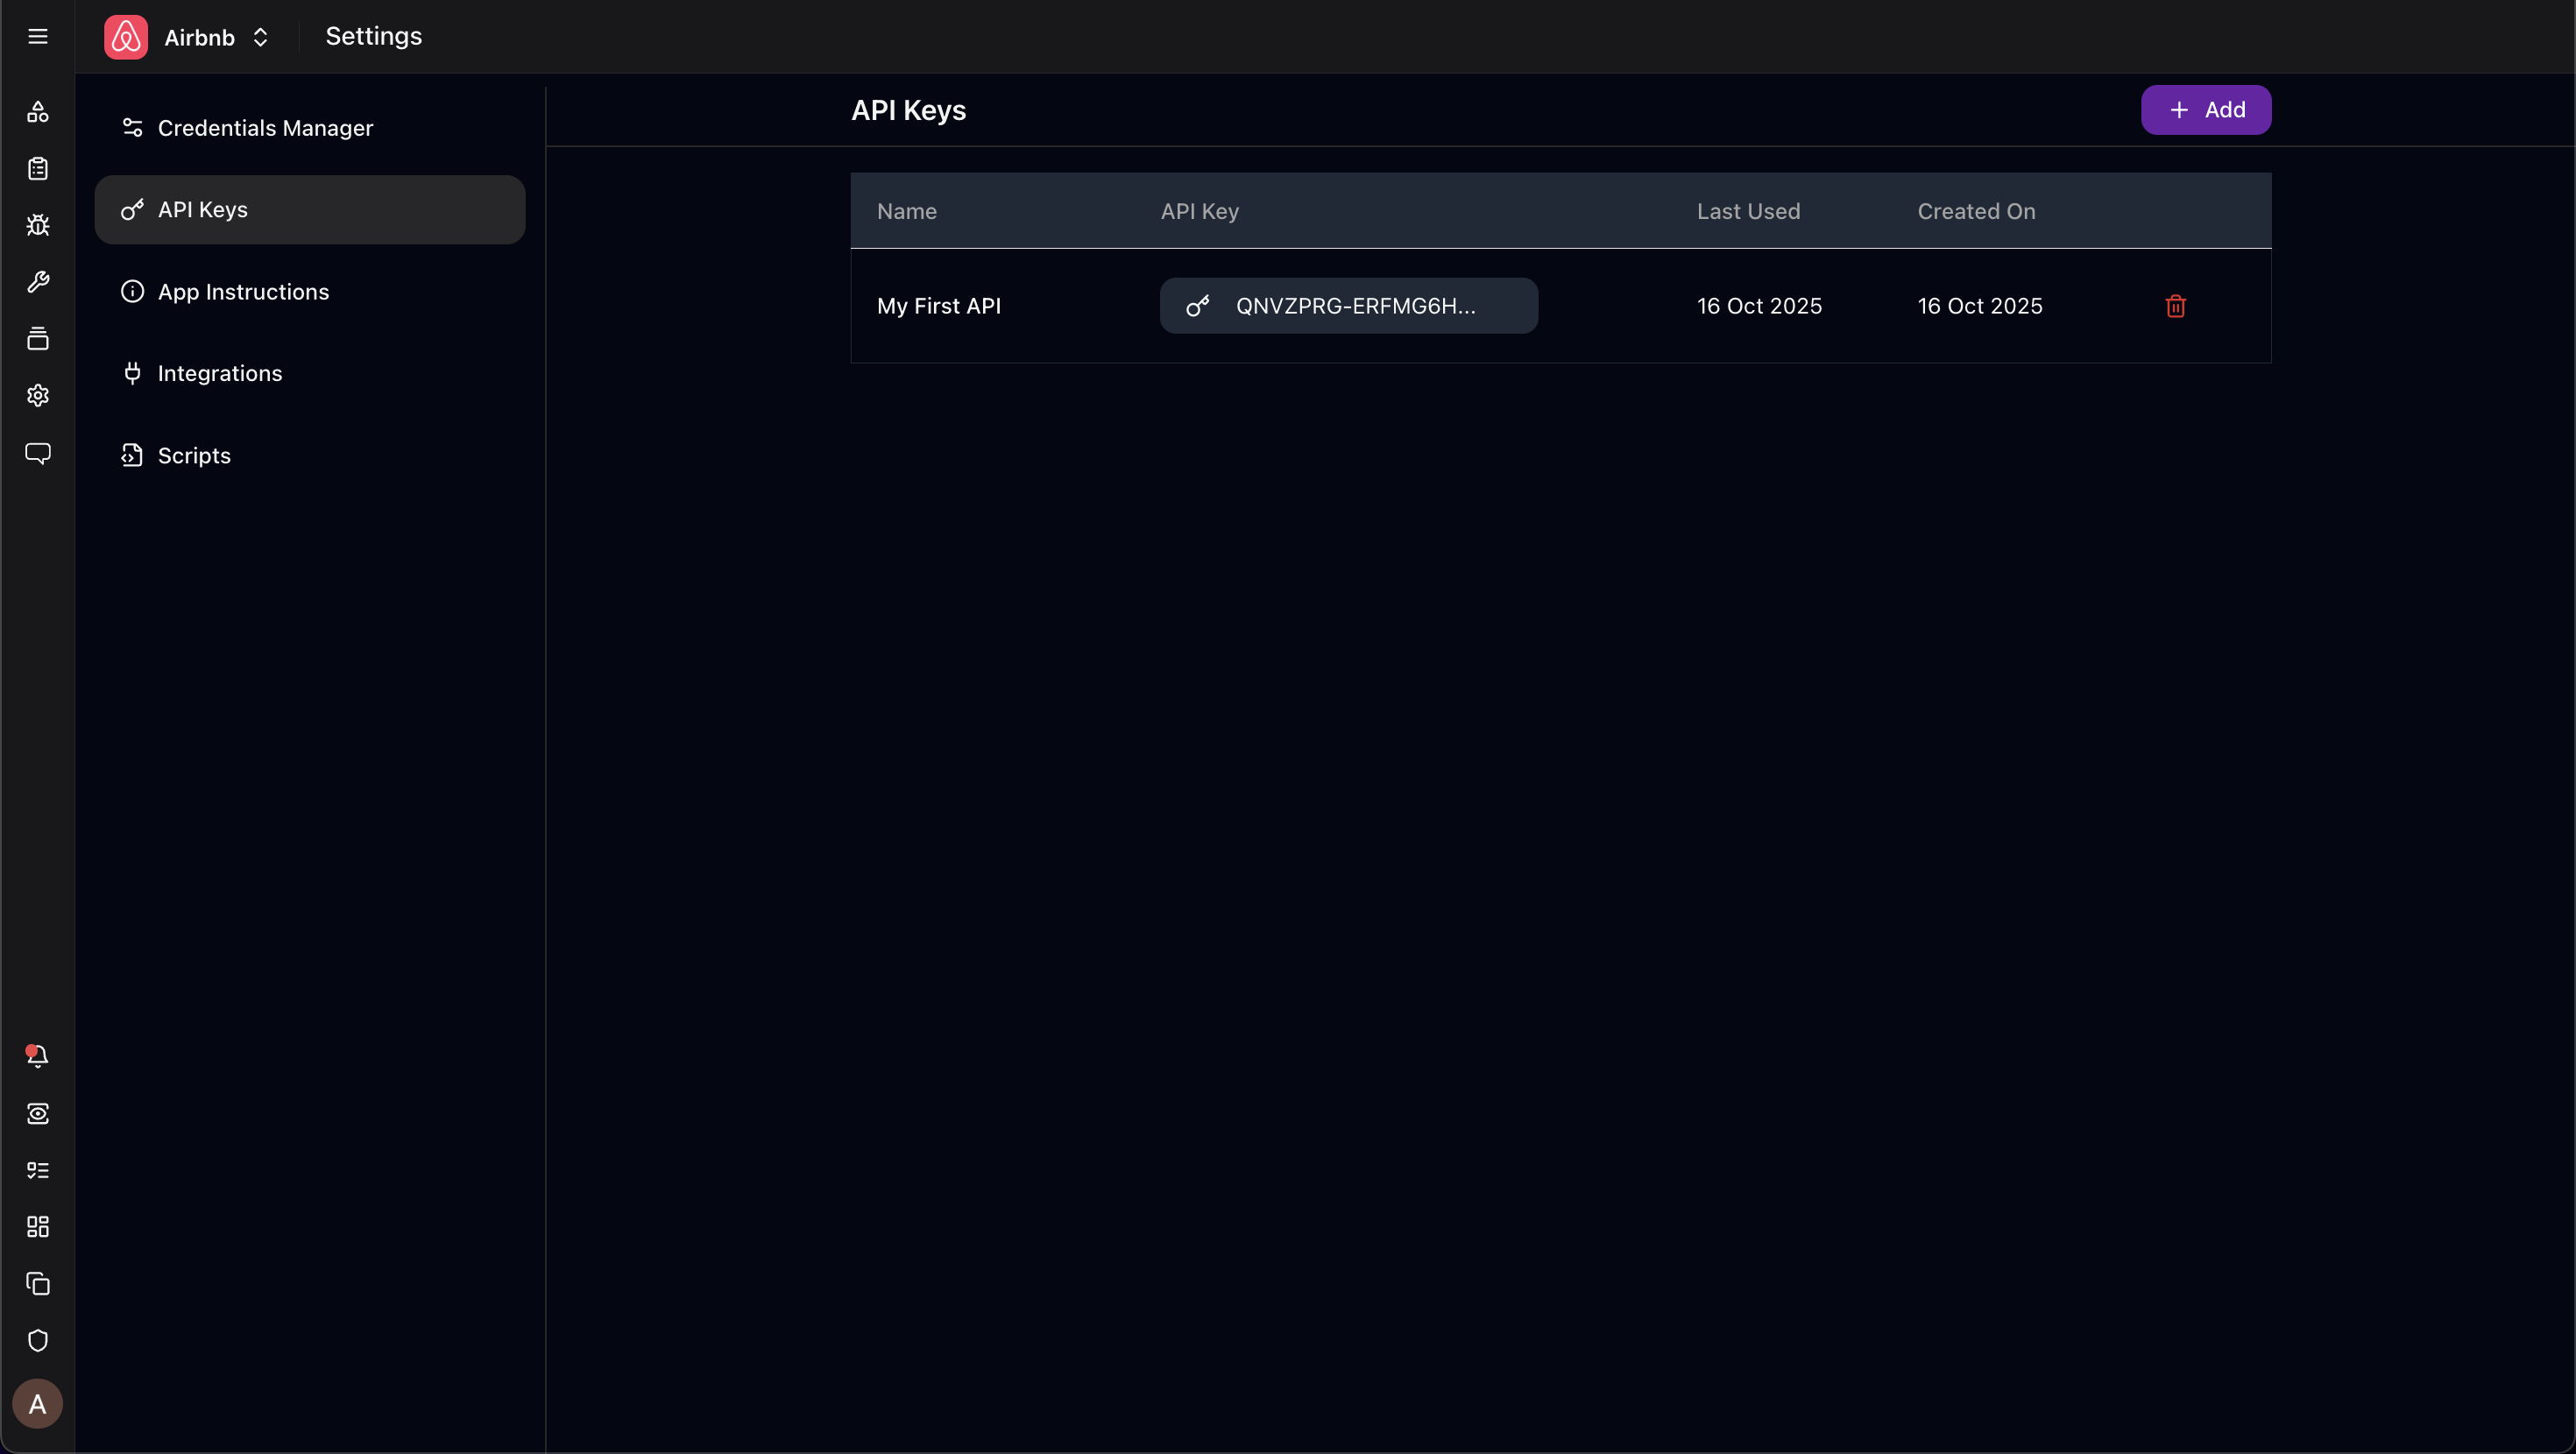
Step 1: Generate Your API Key
- Log in to app.pie.inc
- Go to Settings → API Keys
- Click + Create API Key
- Name your key (e.g., “Claude Integration”) and click Create
- Copy the key immediately - you won’t see it again
- Click Done to acknowledge you’ve copied the key
Step 2: Configure Your Platform
Choose your platform and follow the configuration steps:
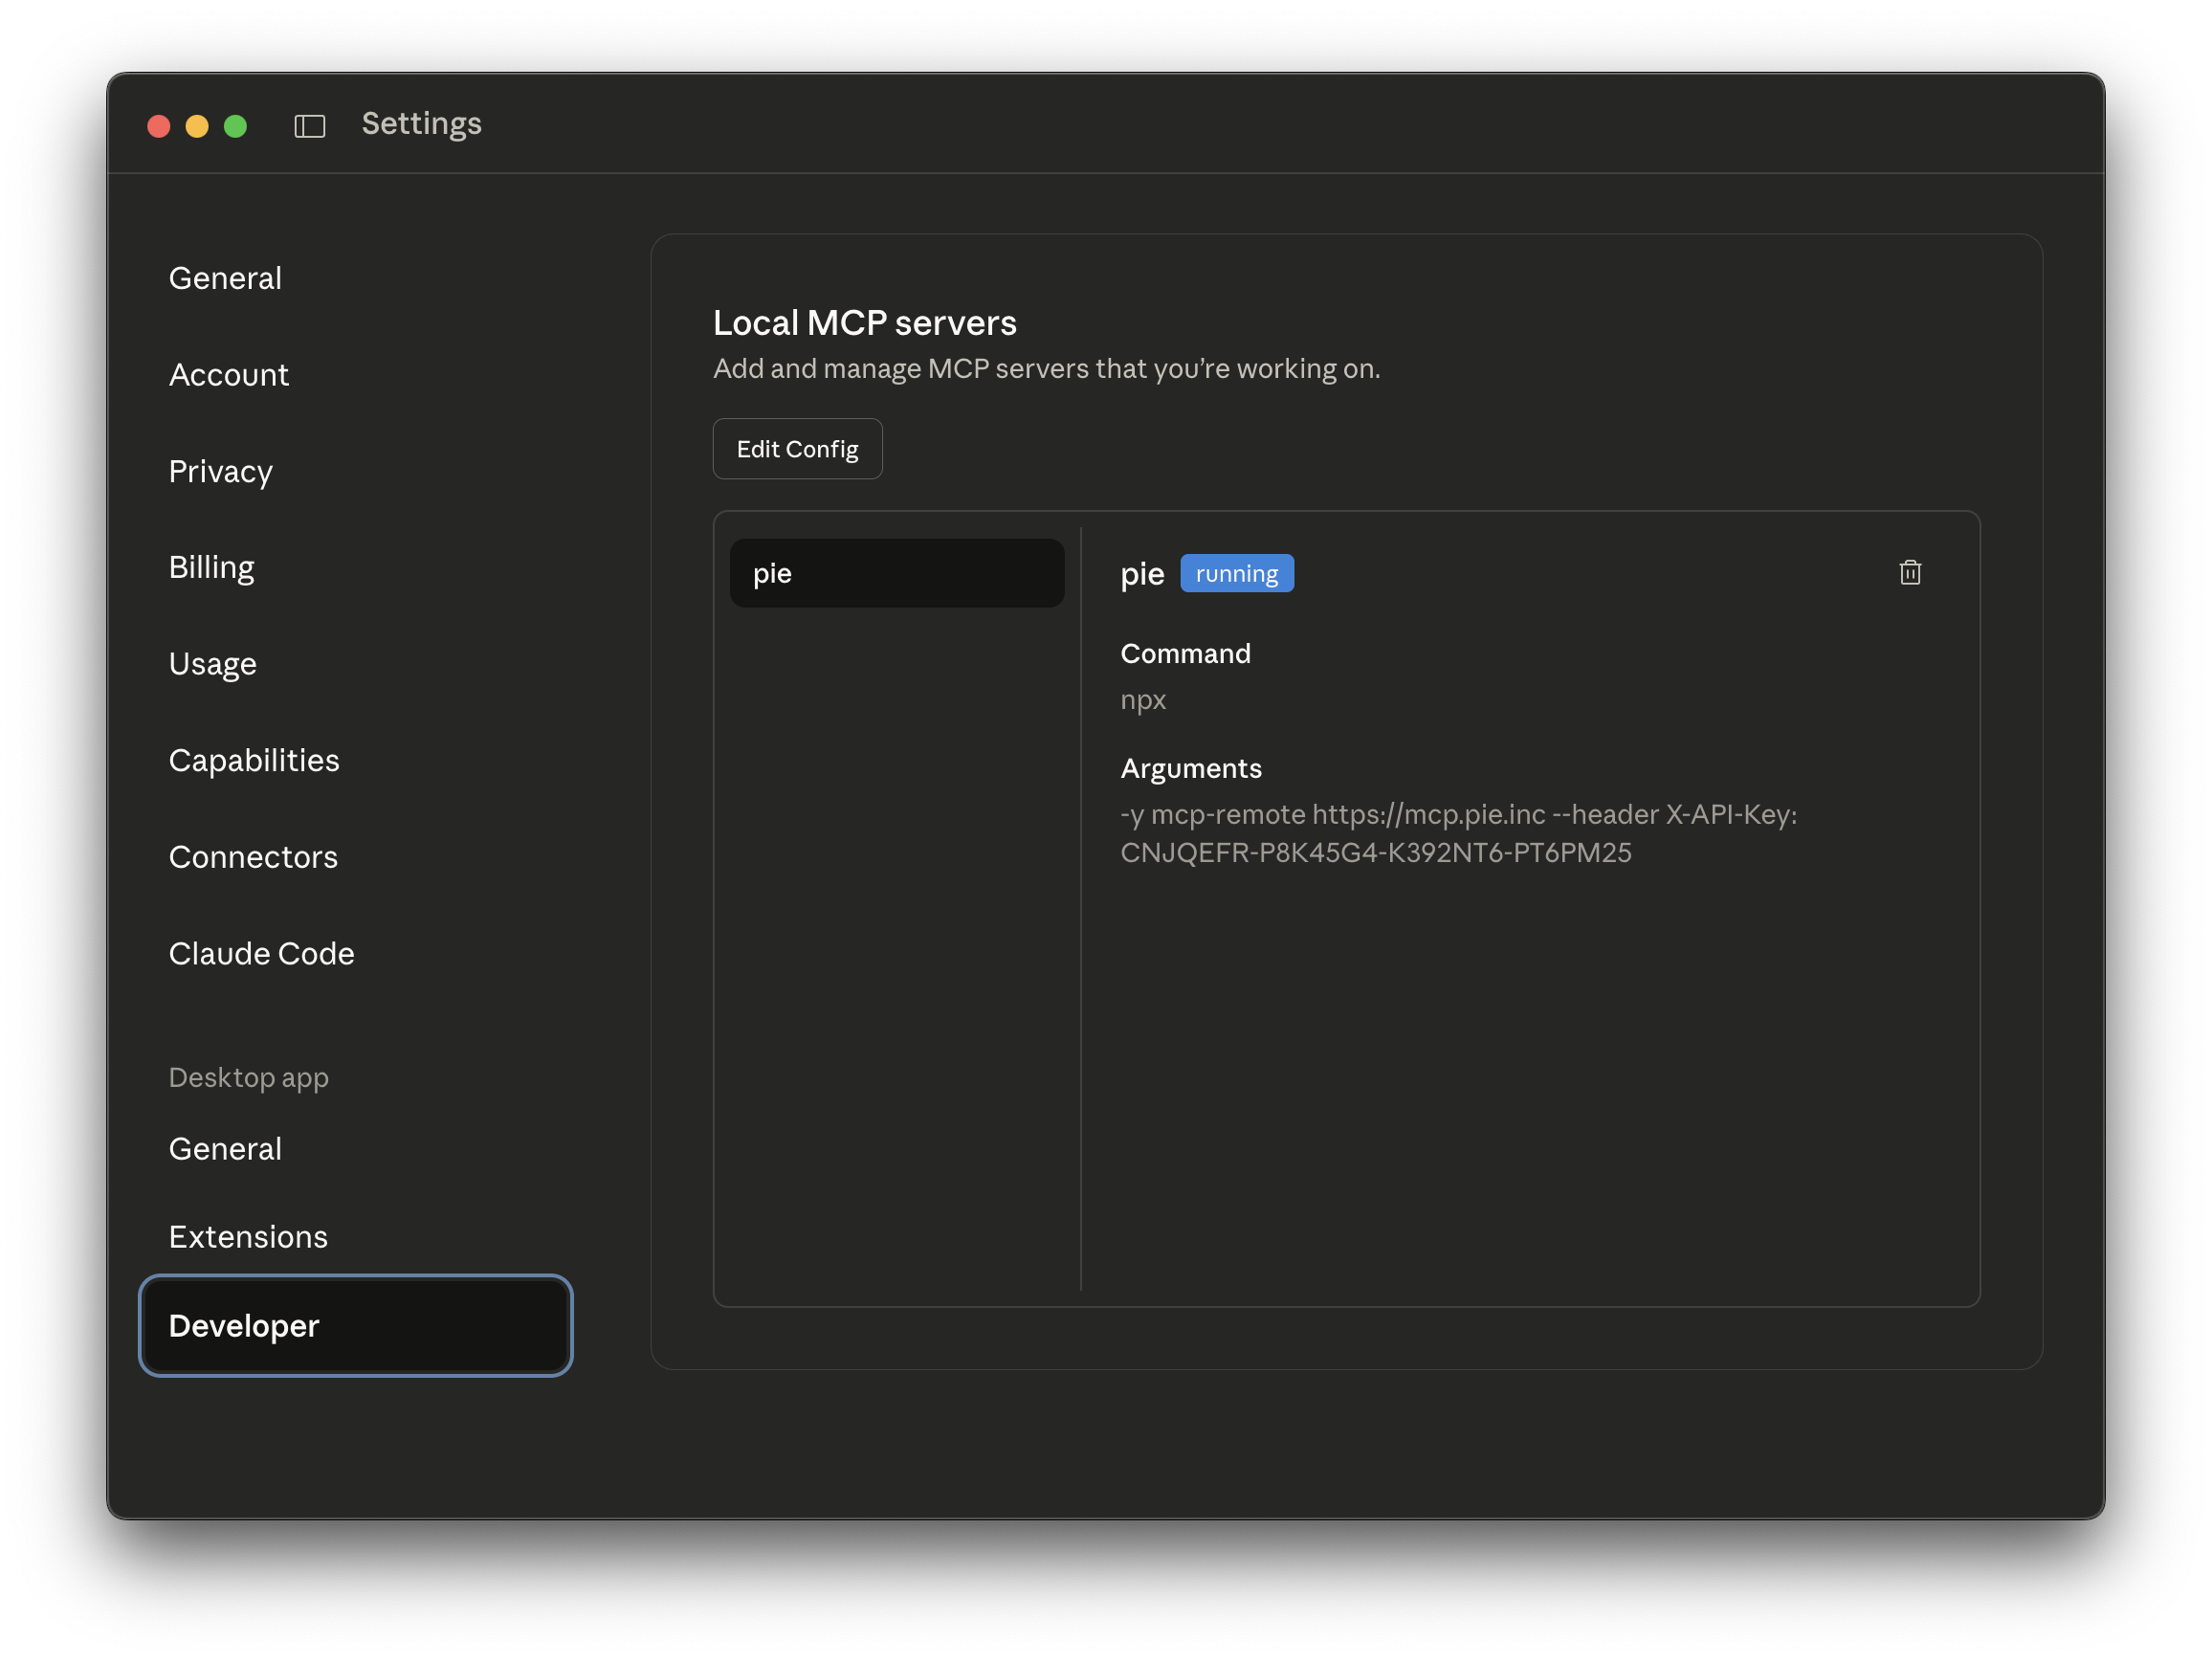
Claude Desktop
- Open Claude Desktop → Settings → Developer → Edit Config
- Add Pie to your configuration file:
{
  "mcpServers": {
    "pie": {
      "command": "npx",
      "args": [
        "-y",
        "mcp-remote",
        "https://mcp.pie.inc",
        "--header",
        "X-API-Key: YOUR_API_KEY_HERE"
      ]
    }
  }
}
Note: Windows users should replace “npx” with “npx.cmd”
For multiple Pie apps:
{
  "mcpServers": {
    "pie-staging": {
      "command": "npx",
      "args": [
        "-y",
        "mcp-remote",
        "https://mcp.pie.inc",
        "--header",
        "X-API-Key: STAGING_API_KEY"
      ]
    },
    "pie-production": {
      "command": "npx",
      "args": [
        "-y",
        "mcp-remote",
        "https://mcp.pie.inc",
        "--header",
        "X-API-Key: PRODUCTION_API_KEY"
      ]
    }
  }
}- Save the file
- Quit Claude completely (not just close the window) and restart
Cursor
- Open Cursor settings and navigate to the MCP configuration file
- Add Pie to your configuration:
{
  "mcpServers": {
    "pie": {
      "url": "https://mcp.pie.inc",
      "headers": {
        "X-API-Key": "YOUR_API_KEY_HERE"
      }
    }
  }
}- Save the file and restart Cursor
VS Code
- Open VS Code settings and locate the MCP servers configuration
- Add Pie to your configuration:
{
  "servers": {
    "pie": {
      "url": "https://mcp.pie.inc?api_key=YOUR_API_KEY_HERE"
    }
  }
}
Note: The API key is passed as a URL parameter in VS Code configuration.
- Save the file and reload VS Code
Claude Code (CLI)
Run this command in your terminal:
claude mcp add --transport http pie https://mcp.pie.inc \
  --header "X-API-Key: YOUR_API_KEY_HERE"
Replace YOUR_API_KEY_HERE with the API key you copied from Pie.
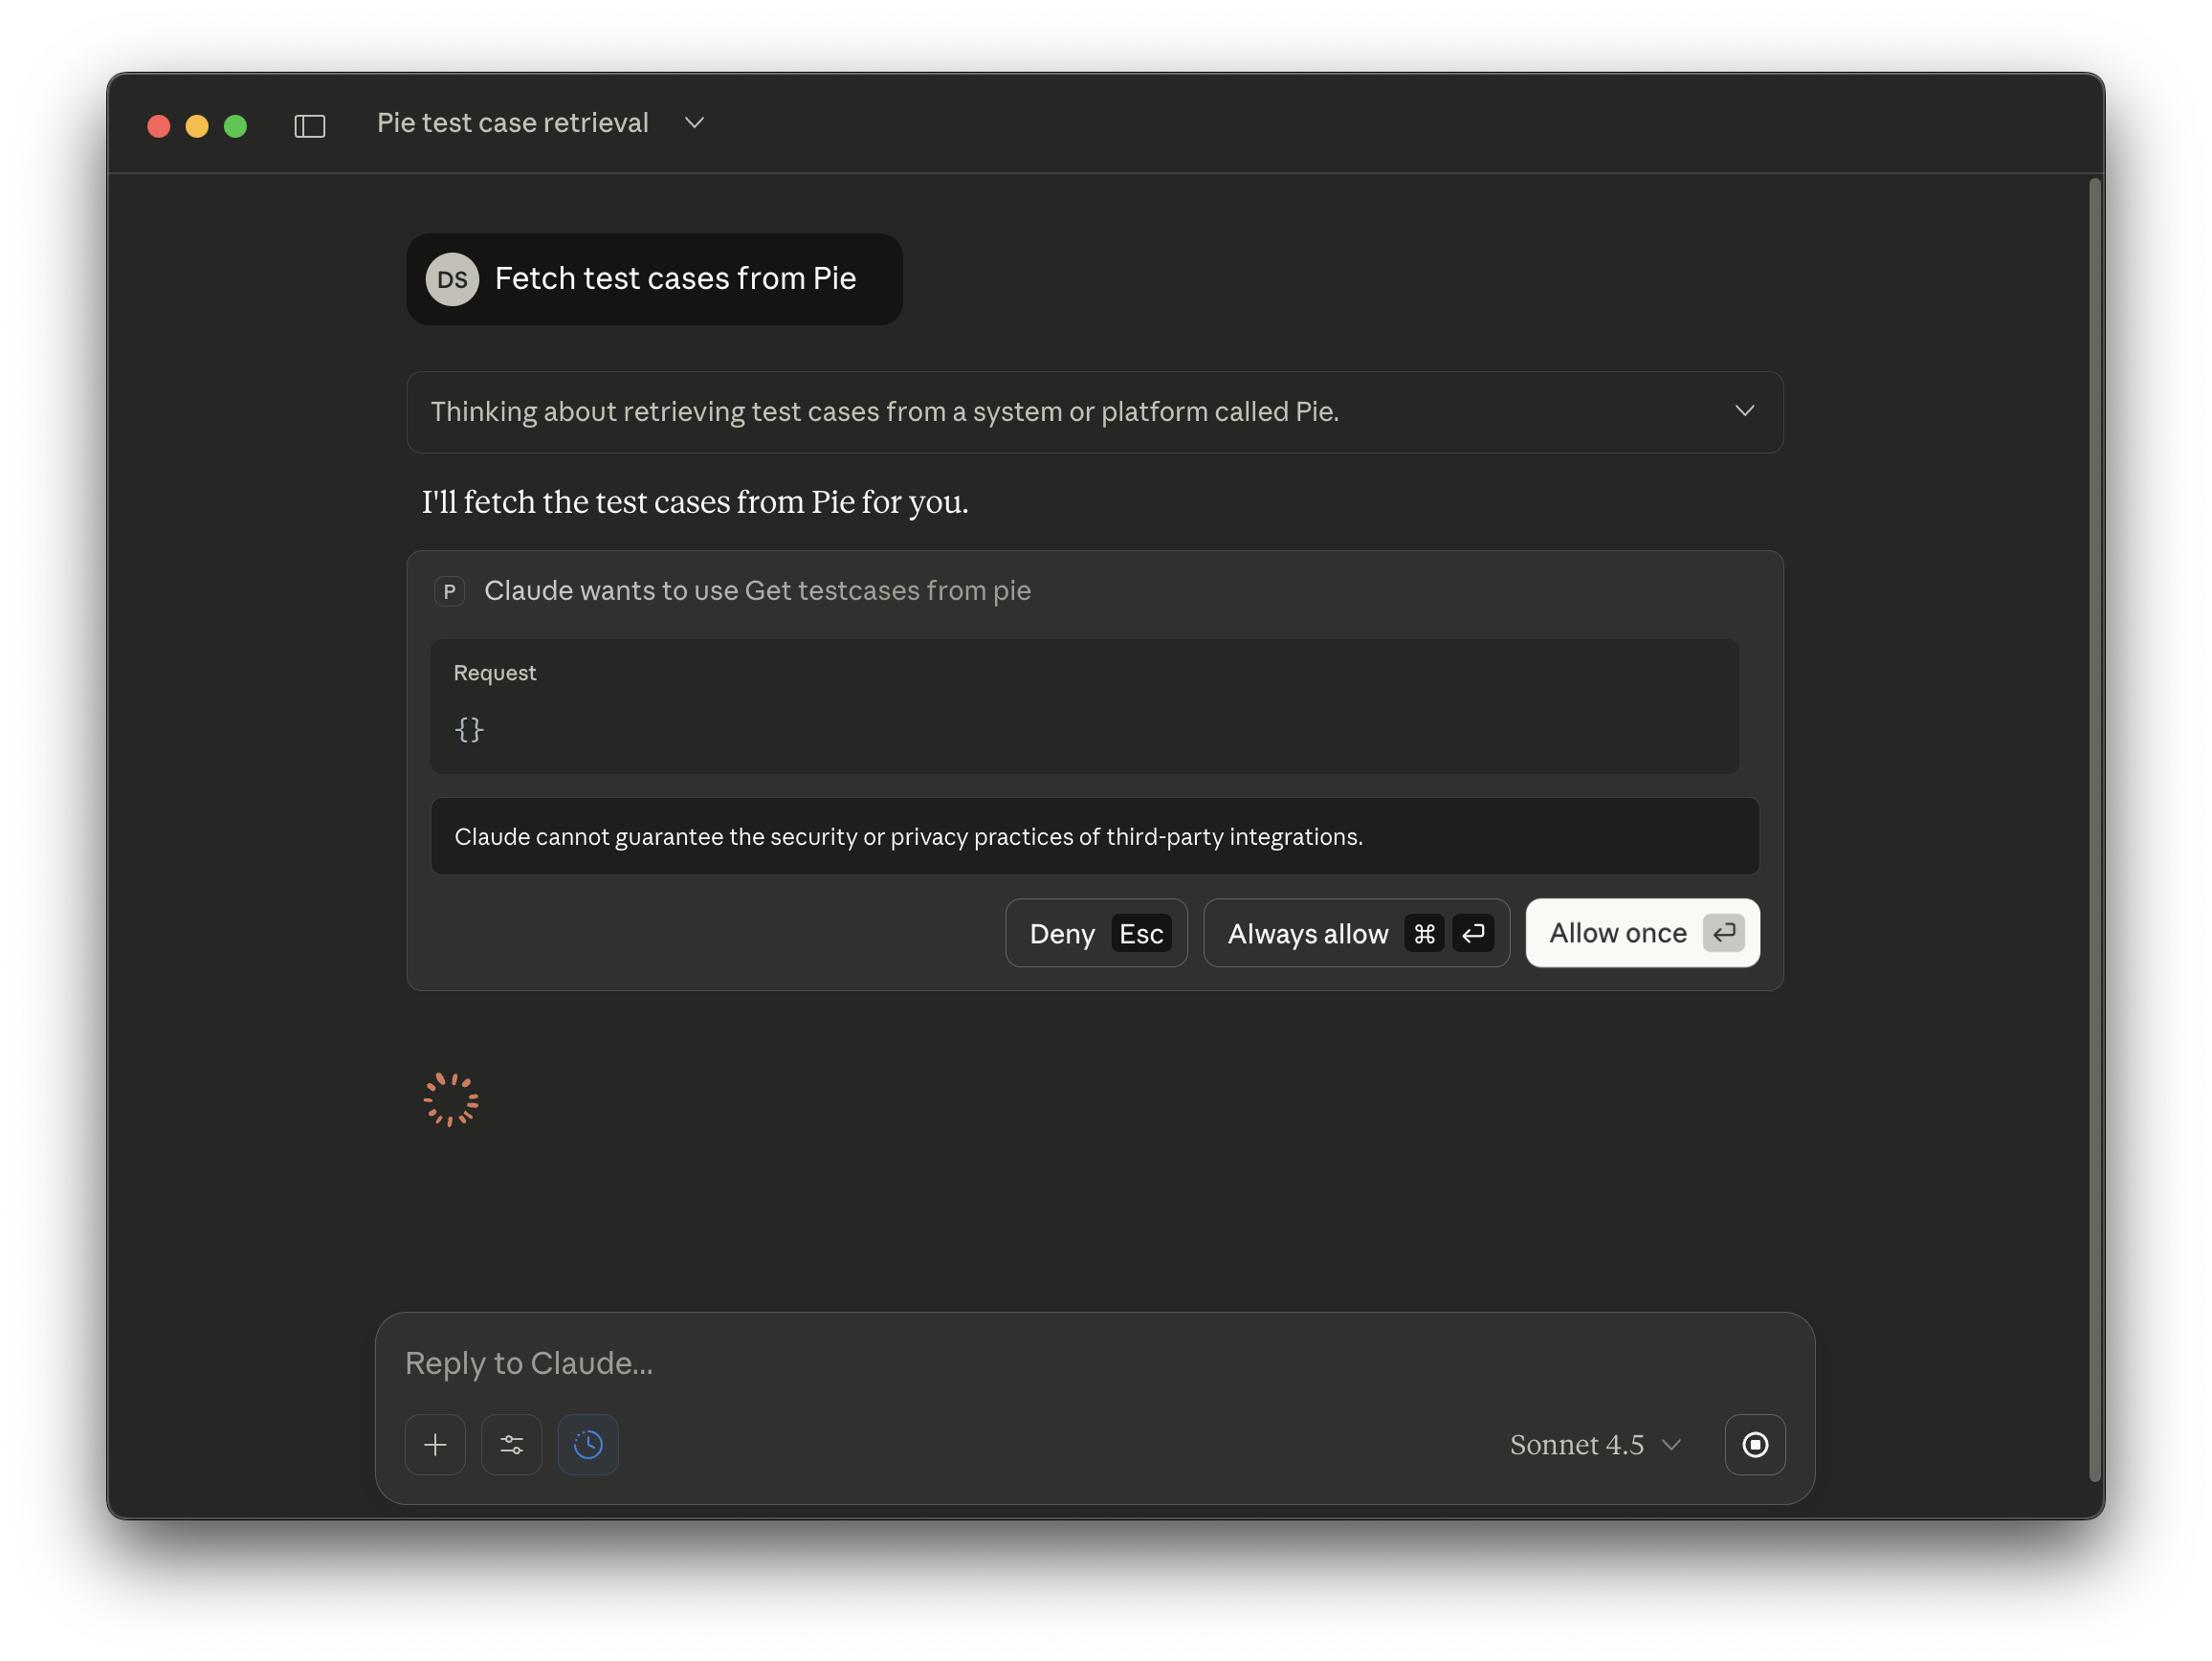
Step 3: Test Your Connection
Open your AI platform and type:
Fetch PieYou should see an overview of your app including test runs, coverage, and active issues.
What You Can Do
Key Workflows
AI-Powered Bug Fixing: Fetch issues with full context (repro steps, screenshots, expected/observed behavior) → AI agent fixes code → creates PRs. Single issues or batch operations.
Test Case Management: Create, run, update, archive test cases. Import from CSV, find duplicates, expand coverage.
Issue Management: Review, approve, reject, resolve issues. Cross-run analysis and duplicate detection.
Reporting: Weekly summaries, coverage analysis, trend analysis across runs.
For all 37 tools with natural language examples, see the Complete Function Reference.
Need Help?
- Documentation: docs.pie.inc
- Troubleshooting: MCP Troubleshooting
- Support: support@pie.inc